Your Event Checklist: What to Set Up Before Going Live
Getting Started Guide
You’ve created an event, but before you share it with the world, let’s make sure it’s ready. This checklist takes about 10 minutes and ensures volunteers have everything they need to say “yes” and show up.
The Essential Checklist
Open your event in Serve.Love and work through these items:
1. Event Title
Your title is the first thing volunteers see. Make it clear and specific:
- Good: “Food Bank Sorting – Saturday Morning”
- Less clear: “Volunteer Opportunity”
Include the type of work when possible. Volunteers want to know what they’re signing up for at a glance.
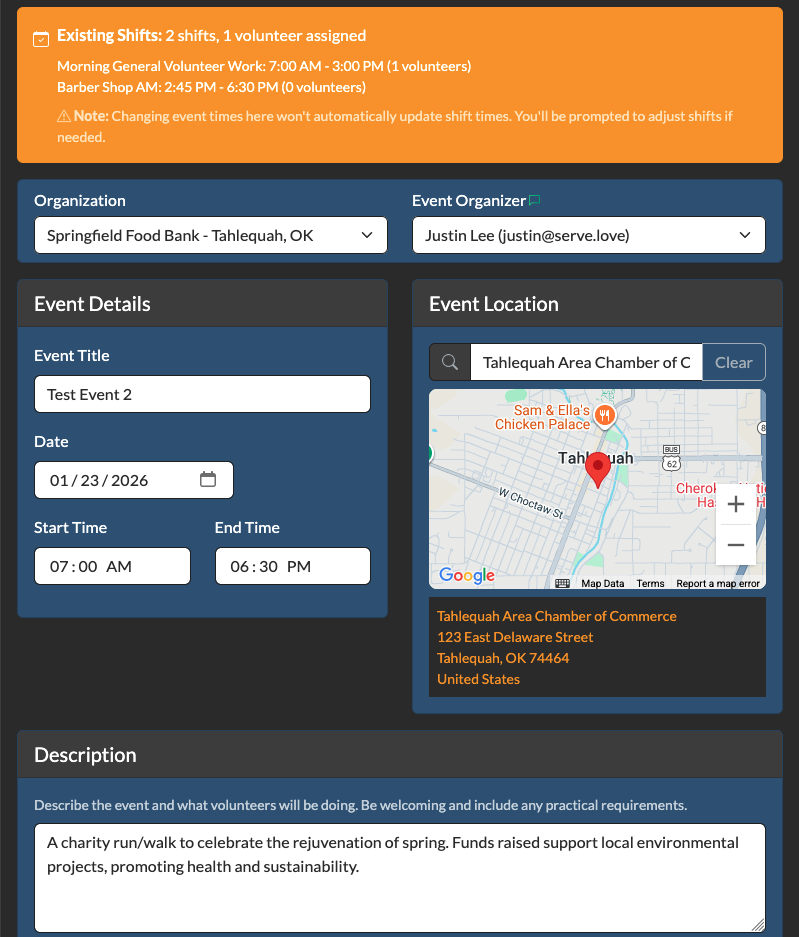
2. Date, Time, and Location
Double-check these basics:
- Date – Is it the correct day?
- Start and end time – Be specific. “9am-12pm” is better than “morning.”
- Address – Full street address so the map link works correctly
- Location notes – Where to park, which entrance to use, who to ask for
3. Event Description
Answer the questions volunteers are thinking:
- What will I be doing?
- Why does this matter?
- Do I need any skills or experience?
- What should I wear or bring?
- Will there be breaks, food, or water?
Keep it scannable. Short paragraphs and bullet points work better than walls of text.
4. Event Image
Events with images get significantly more signups. A photo helps volunteers picture themselves there.
- Best option: A photo from a previous event showing real volunteers at work
- Good alternative: A photo of the location or the people you serve
- Avoid: Stock photos that feel generic or staged
Don’t have a photo yet? That’s okay for your first event – just make adding one a priority for next time.
5. Volunteer Spots
How many volunteers do you need? Set a limit that makes sense:
- Too few and your event fills up before you can promote it
- Too many and there may not be enough work to go around
When in doubt, start smaller. You can always increase the limit later, but disappointed volunteers who showed up with nothing to do won’t come back.
6. Shifts (Optional)
Need volunteers at different times? Set up shifts instead of one big time block:
- Morning shift: 8am-11am (10 spots)
- Afternoon shift: 1pm-4pm (10 spots)
Shifts help you maintain coverage throughout the day and give volunteers flexibility to pick times that work for their schedules.
For simple events where everyone arrives and leaves together, you don’t need shifts – the default single time slot works fine.
7. Custom Signup Form (Optional)
Need information beyond name and contact details? Attach a form to your event:
- T-shirt size – if you’re giving out shirts
- Dietary restrictions – if you’re providing food
- Emergency contact – for outdoor or physical activities
- Skills or certifications – if the work requires them
Keep it short. Every extra question adds friction. Only ask what you actually need.
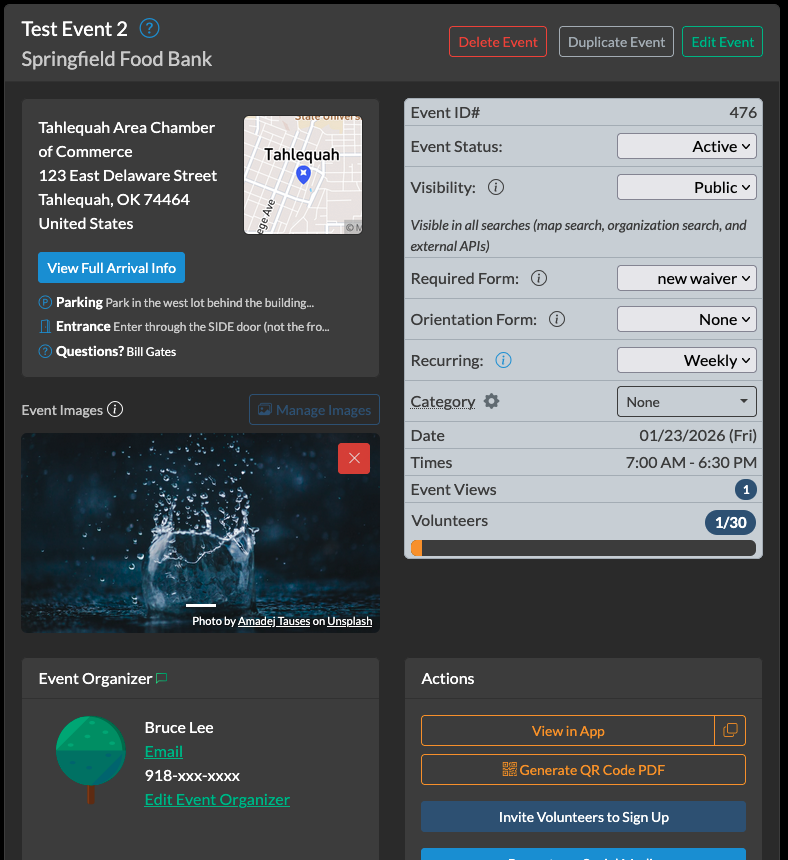
8. Event Status
Check the status dropdown in your event settings:
- Draft – Only you can see it. Use this while setting up.
- Active – Visible to volunteers and accepting signups.
When you’re ready, switch to Active. Your event won’t appear in searches or accept signups until you do.
9. Visibility Settings
Who can find this event? You have three options:
- Public – Visible in all searches: map search, organization search, and external APIs. Anyone looking for volunteer opportunities in your area can discover it.
- Private – Visible when users search your organization directly, but hidden from the general map search and external APIs. Good for events you want existing supporters to find, but not the general public.
- Unlisted – Only accessible via direct link. Hidden from all searches. Use this for invite-only events or when you’re promoting through your own channels (email, social media) and don’t need discovery.
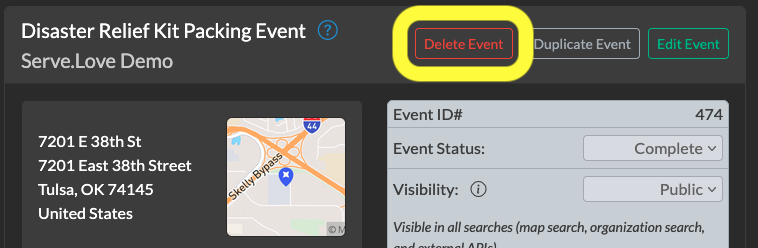
Made a Mistake? No Problem.
Events can be edited anytime—even after they’re live. Changed the start time? Updated the location? Just edit and save. Volunteers who already signed up will see the updated information.
If you need to start over completely, just delete the event. No penalty, no complicated process. Create a new one when you’re ready.
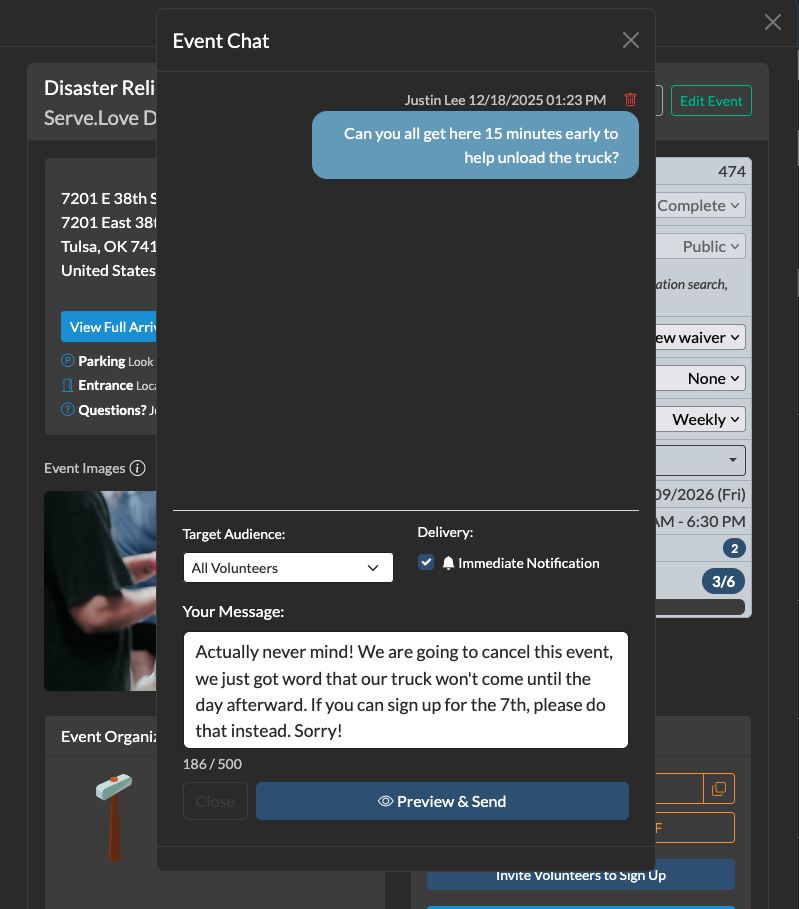
Canceling an Event with Signups
If volunteers have already signed up and you need to cancel, notify them first. Don’t just delete the event and leave people wondering.
The easiest way: use the Communications tab on your event to message everyone at once.
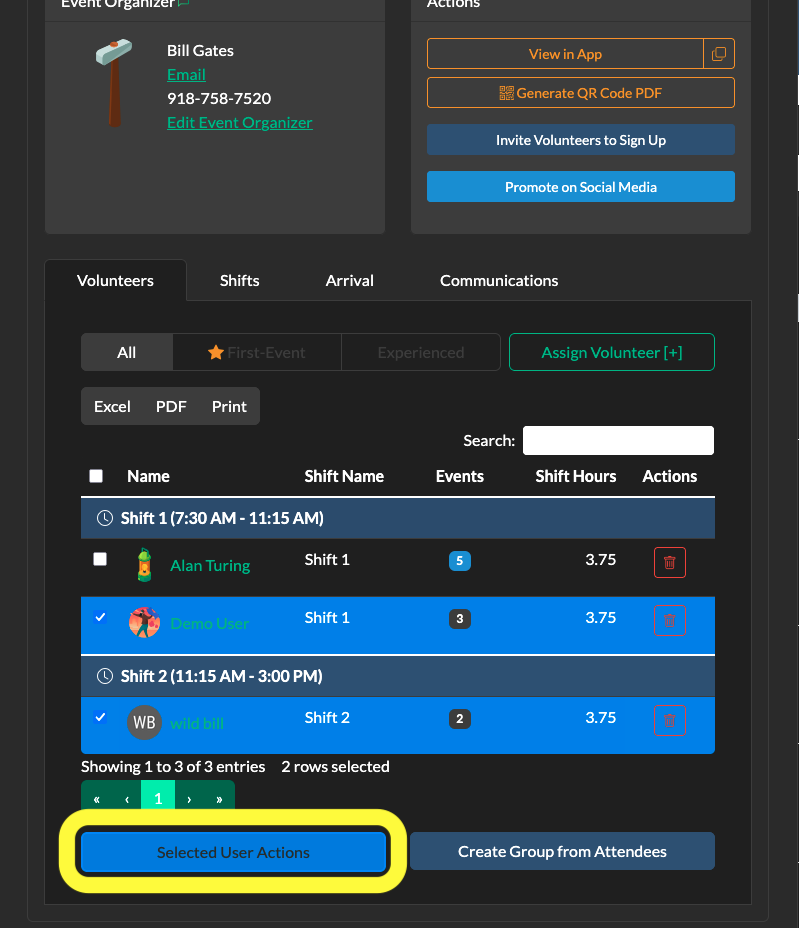
Need to message specific volunteers? Use Selected User Actions from the Volunteers tab. Select who you want to contact, then choose your messaging option.
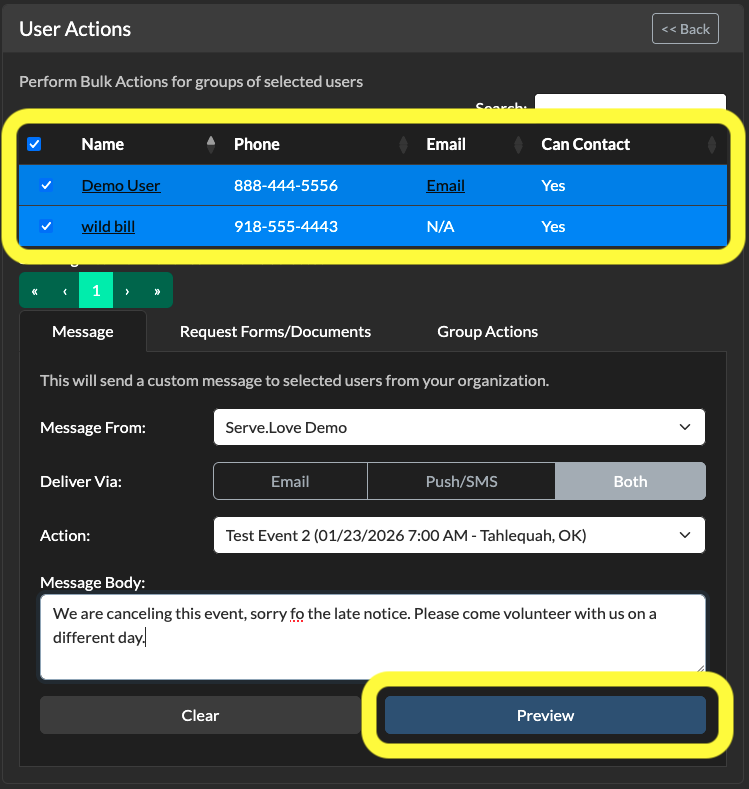
Once you’ve notified everyone, you can safely delete or cancel the event.
Before You Share: A Quick Review
Click View in App to see your event exactly as volunteers will see it. Check for:
- Typos or confusing wording
- Missing information
- Correct date and times
- Working map/address
Have a colleague look at it if you can. Fresh eyes catch things you might miss.
You’re Ready!
Once everything looks good, it’s time to get the word out. Copy your event link from the View in App section and start sharing.
Getting Started Guide — Part 2 of 5
← Previous: How Volunteers Find and Sign Up for Your Events